 Save to Pinterest
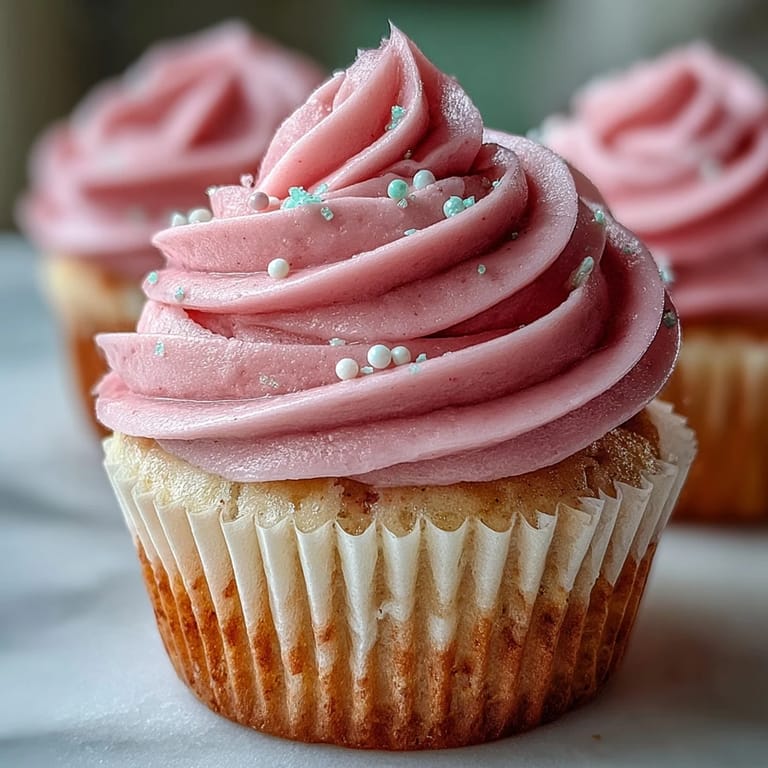
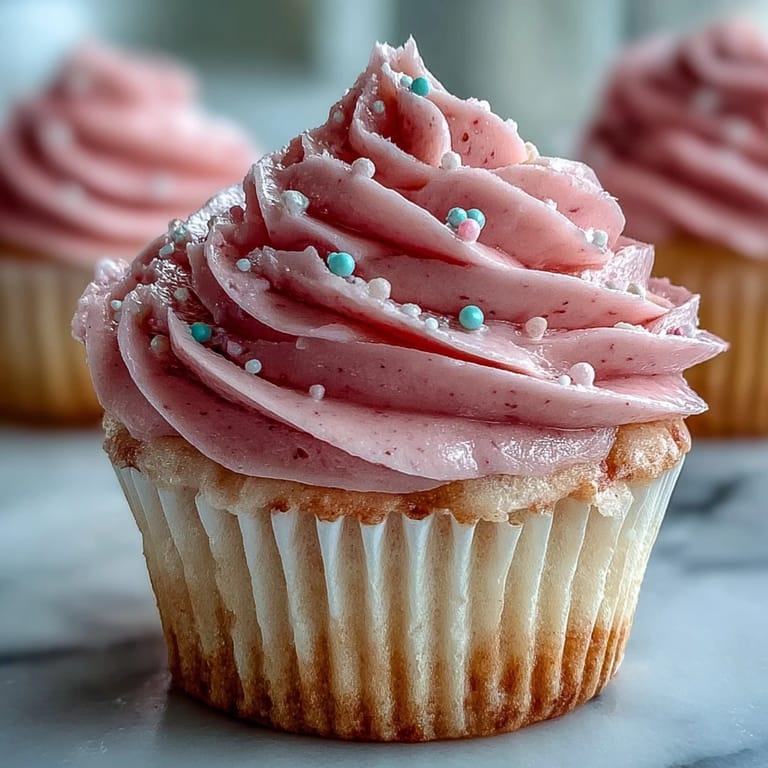
 My daughter asked if cupcakes could be pink without tasting like strawberries, and honestly, I wasn't sure. We stood in the kitchen together, flipping through ideas, until I remembered how a touch of vinegar and buttermilk used to make my grandmother's cakes unbelievably soft. That afternoon, we mixed our first batch of blush-toned cupcakes with nothing but vanilla and a swirl of gel color. They came out of the oven looking like little clouds, and when she bit into one, she grinned so wide I knew we'd found something special.
I made these for a friend's baby shower last spring, and the soft blush tone fit the theme perfectly without feeling overly sweet or cloying. Guests kept asking if they were made with some fancy extract, but the secret was just good vanilla and patience while creaming the butter. One woman told me she hadn't enjoyed a cupcake in years because most felt too heavy, but these changed her mind. Watching people reach for seconds made all the measuring and sifting worth it. Sometimes simplicity really does win.
Ingredients
- Cake flour: This finer grind gives you that delicate, airy texture, and if you don't have it, the cornstarch trick works beautifully every time.
- Baking powder and baking soda: The duo creates lift and a slight tang that plays nicely with the buttermilk, so don't skip either one.
- Unsalted butter: Room temperature is key for a smooth, fluffy batter that incorporates air without leaving lumps.
- Granulated sugar: Creaming this with the butter builds structure and sweetness, and it dissolves cleanly into the batter.
- Egg: One large egg at room temperature binds everything together and adds richness without making the cupcakes dense.
- Buttermilk: The acidity tenderizes the crumb and adds a subtle depth that keeps these from tasting one-dimensional.
- Pure vanilla extract: A full teaspoon makes all the difference, giving the cupcakes a warm, rounded flavor that shines through the frosting.
- White vinegar: Just a teaspoon reacts with the baking soda to create lift and a soft, pillowy texture.
- Pink gel food coloring: Gel is more concentrated than liquid, so you get vibrant color without thinning the batter.
- Powdered sugar: Sifting prevents lumps in the buttercream, and you can adjust the amount to match your sweetness preference.
- Heavy cream or whole milk: A splash loosens the frosting to a pipeable consistency and adds a hint of creaminess.
- Pinch of salt: Balances the sweetness in the frosting and keeps it from feeling too sugary.
Tired of Takeout? 🥡
Get 10 meals you can make faster than delivery arrives. Seriously.
One email. No spam. Unsubscribe anytime.
Instructions
- Prep your oven and pan:
- Preheat to 350°F and line your muffin tin with paper liners so the cupcakes release cleanly. This step sounds basic, but starting with a properly heated oven ensures even baking.
- Sift the dry ingredients:
- Combine cake flour, baking powder, baking soda, and salt in a medium bowl, whisking to break up any clumps. Sifting aerates the flour and prevents dense spots in your batter.
- Cream the butter and sugar:
- Beat room-temperature butter on medium for a minute, then gradually add granulated sugar, beating for 2 to 3 minutes until the mixture looks pale and fluffy. This step incorporates air, which gives your cupcakes lift.
- Add the egg and vanilla:
- Lightly beat the egg in a small bowl, then pour it in slowly with the mixer on low, followed by the vanilla extract. Mixing gently here keeps the batter smooth without deflating all that air you just built.
- Alternate dry and wet ingredients:
- Add one-third of the dry mix, then half the buttermilk, and repeat, finishing with the last of the dry ingredients. Scrape down the bowl between additions and mix only until just combined to avoid a tough crumb.
- Tint the batter:
- Stir the white vinegar and pink gel food coloring together in a small cup, then pour it into the batter on low speed. Mix until the color is evenly distributed and the batter looks like a soft blush.
- Fill the liners:
- Divide the batter evenly among the 12 liners, filling each about two-thirds full, then tap the pan gently on the counter to release any trapped air bubbles. This helps the tops bake smooth and even.
- Bake until just set:
- Slide the pan into the oven for 18 to 22 minutes, checking with a toothpick at the 18-minute mark. The cupcakes are ready when a toothpick comes out clean or with just a few moist crumbs.
- Cool completely:
- Let the cupcakes rest in the pan for 5 minutes, then transfer them to a wire rack. Frosting warm cupcakes will melt your buttercream, so patience here is essential.
- Make the buttercream:
- Beat room-temperature butter until creamy, then gradually add powdered sugar on low speed, increasing to medium once it's incorporated. Add vanilla, cream, and a pinch of salt, then beat on medium-high for 1 to 2 minutes until light and fluffy.
- Frost and decorate:
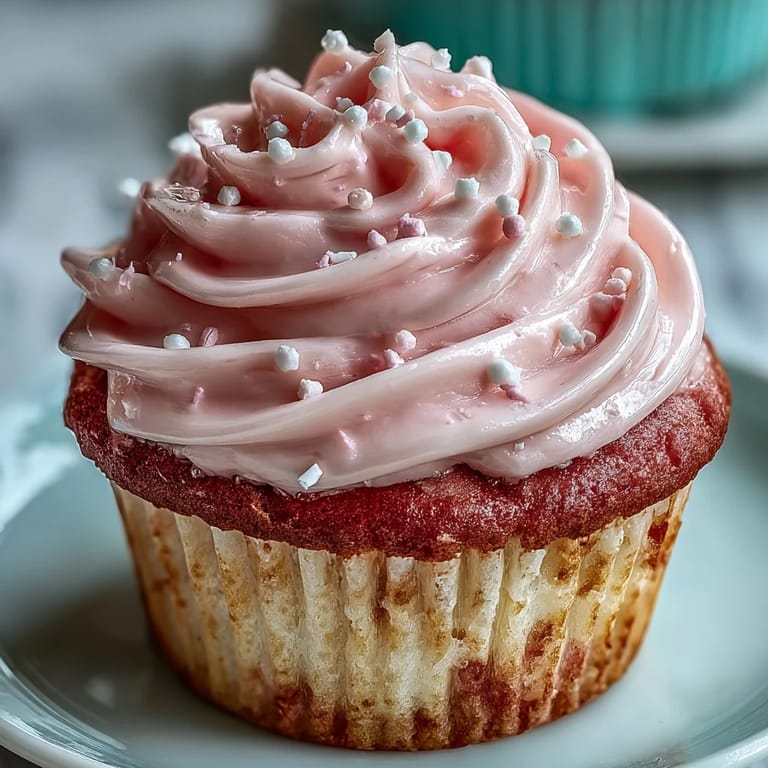
- Transfer the buttercream to a piping bag or use an offset spatula to swirl it onto each cooled cupcake. Finish with sprinkles, edible pearls, or pink sanding sugar if you're feeling fancy.
 Save to Pinterest
 One evening, my neighbor came over with a rough day written all over her face, and I handed her a pink cupcake without saying much. She sat at my kitchen table, peeled back the liner slowly, and took a bite, and I watched her shoulders drop just a little. Sometimes a small, pretty thing can shift the mood of an entire moment. That's when I realized these weren't just for parties or special occasions, they were for Tuesdays, too.
Storing and Make-Ahead Tips
Frosted cupcakes stay fresh in an airtight container at cool room temperature for up to two days, but if your kitchen runs warm, the fridge is safer. You can bake the cupcakes a day ahead and store them unfrosted, then whip up the buttercream and decorate them the morning of your event. I've even frozen unfrosted cupcakes for up to a month, wrapping each one tightly in plastic wrap and then foil, and they thawed beautifully on the counter in about an hour. The buttercream can also be made ahead and kept in the fridge for up to a week, just bring it to room temperature and re-whip it before piping.
Troubleshooting Common Issues
If your cupcakes sink in the middle, you likely overmixed the batter or opened the oven door too early, releasing heat before they set. Dry cupcakes usually mean they baked too long or the oven ran hot, so invest in an oven thermometer if this keeps happening. When the frosting turns out too runny, add more powdered sugar a tablespoon at a time until it holds a stiff peak. If the color looks streaky instead of uniform, keep mixing on low for another 20 seconds after adding the vinegar and gel blend.
Variations and Serving Ideas
You can swap the pink gel for a drop of beet powder if you want a natural tint, though the color will be softer and more muted. For a citrus twist, replace half the vanilla extract with lemon or orange zest, which brightens the whole flavor profile. I've also filled these with a dollop of raspberry jam before frosting, using a small spoon to scoop out the center and then piping the buttercream over the top.
- Top with fresh raspberries or a single edible flower for an elegant finish.
- Dust with a light sprinkle of edible glitter or gold leaf for a celebration vibe.
- Serve alongside a scoop of vanilla bean ice cream for a more indulgent dessert.
 Save to Pinterest
 These cupcakes have a way of making ordinary moments feel a little more special, whether you're celebrating something big or just need a reason to smile. I hope they bring as much joy to your kitchen as they have to mine.
Recipe FAQs
- → What makes pink velvet different from red velvet?
Pink velvet cupcakes achieve their delicate blush hue through pink gel food coloring rather than cocoa powder and red dye used in traditional red velvet. The flavor profile remains similar—tangy, moist, and lightly sweet—but pink velvet tends to be more subtle and elegant in both appearance and taste.
- → Can I use natural food coloring instead of gel?
Absolutely. Beet powder or freeze-dried strawberry powder create beautiful natural pink tints. Start with 1 teaspoon of beet powder and adjust until you reach your desired shade. Natural colorings produce softer, more pastel results compared to vibrant gel colors.
- → Why is room temperature temperature important?
Room temperature ingredients emulsify properly, creating uniform batter texture. Cold butter won't cream effectively with sugar, leading to dense cupcakes. Cold eggs and buttermilk can cause butter to seize, creating pockets of grease and uneven mixing.
- → How do I know when cupcakes are done baking?
Insert a toothpick into the center—it should emerge with just a few moist crumbs, not wet batter. The tops should spring back lightly when touched, and edges should just begin pulling away from the pan sides. Overbaking leads to dry crumbs.
- → Can I make the buttercream ahead of time?
Yes, prepare vanilla buttercream up to 2 days in advance. Store in an airtight container at room temperature. Before frosting, give it a quick whip to restore fluffiness. If it's too stiff, add cream 1 teaspoon at a time until pipeable.
- → What's the best way to store these cupcakes?
Keep frosted cupcakes in an airtight container at cool room temperature for up to 2 days. For longer storage, refrigerate up to 5 days, though the buttercream may firm slightly. Bring to room temperature 30 minutes before serving for optimal texture and flavor.