 Save to Pinterest
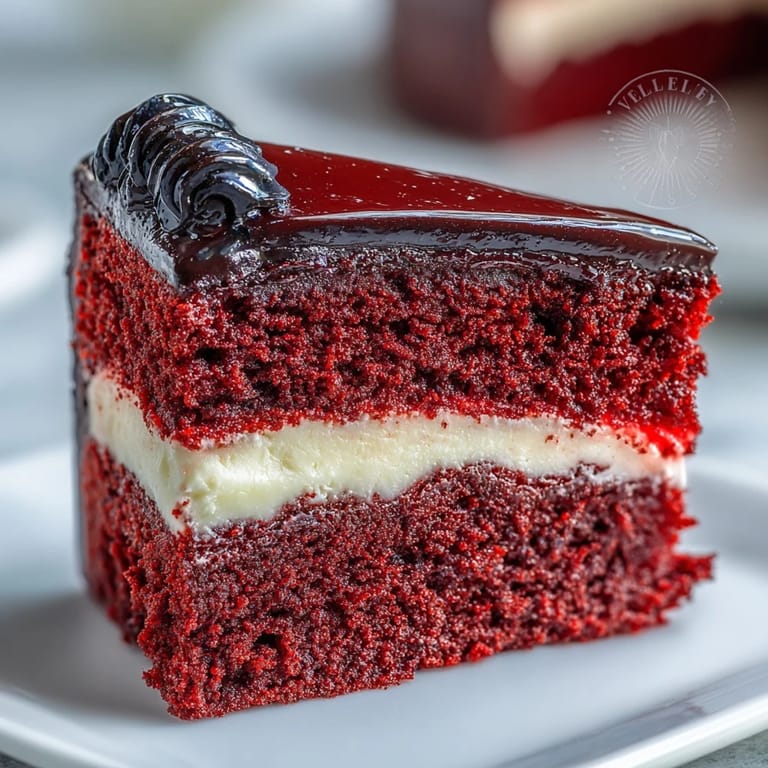
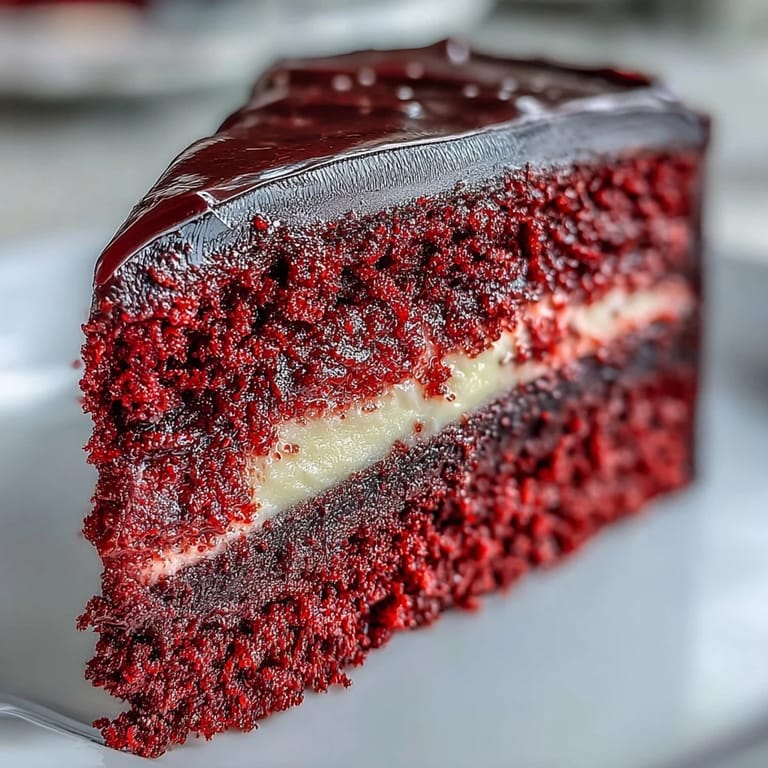
 The moment I decided to tackle a Betty Boop cake, my kitchen looked like an art studio explosion. Red food coloring stained my countertop, black fondant dusted everything in sight, and I found myself questioning why I had volunteered to make this for my niece's birthday. Yet watching that cartoon face come together layer by layer, something magical happened. The house filled with buttercream sweetness while old Betty Boop cartoons played on my tablet in the background, making the whole process feel delightfully whimsical.
My first attempt at Betty's signature black hair ended up looking more like a lopsided mushroom cloud. I had rolled the fondant too thick in some spots and too thin in others, creating weird droopy sections that refused to hold their shape. But that disaster taught me everything about working with fondant consistency and timing. The next time around, I prepared the decorations the night before, giving them time to firm up properly, and the difference was night and day.
Ingredients
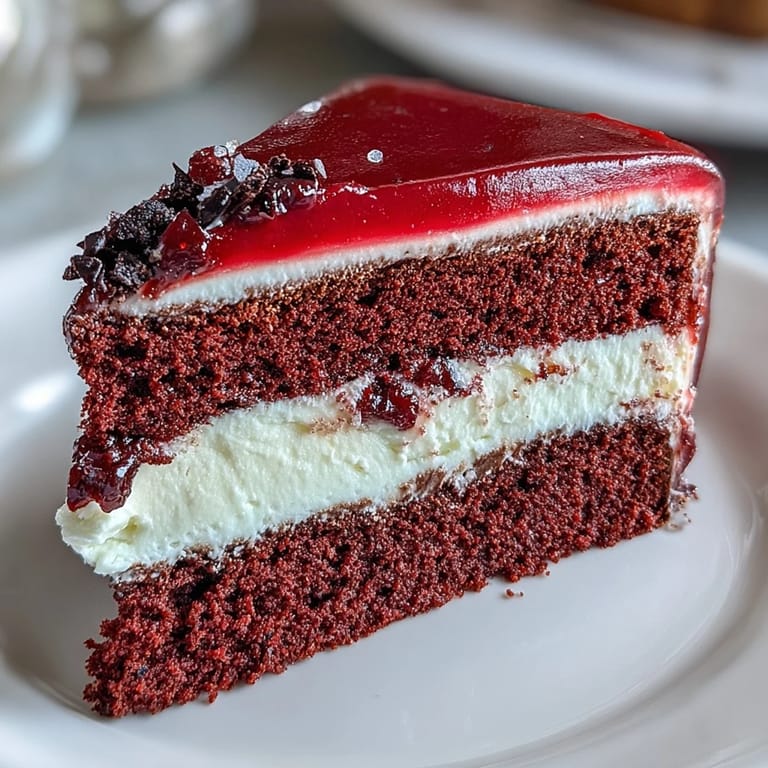
- All-purpose flour: The foundation that gives the red velvet layers structure while keeping them tender
- Red gel food coloring: Gel delivers that intense cartoon red without thinning your batter like liquid dye would
- Cream cheese: Must be completely room temperature or you will end up with lumpy buttercream every single time
- Black fondant: Knead thoroughly before rolling to prevent cracking and those telltale white streaks
- Cornstarch: Your best friend for rolling fondant without it sticking to everything in sight
Tired of Takeout? 🥡
Get 10 meals you can make faster than delivery arrives. Seriously.
One email. No spam. Unsubscribe anytime.
Instructions
- Preheat and prep your pans:
- Line those 8-inch rounds with parchment circles and grease the sides thoroughly because red cake loves to stick
- Whisk the dry ingredients together:
- Flour, baking powder, and salt need to be evenly distributed before they meet the wet ingredients
- Cream butter and sugar:
- Beat these together for a full 3 minutes until the mixture looks pale and fluffy, trapping tiny air bubbles
- Add eggs and vanilla:
- Drop in those eggs one at a time, letting each disappear completely before introducing the next one
- Combine wet and dry:
- Alternate between flour mixture and milk on low speed, starting and ending with the dry ingredients
- Transform into red velvet:
- Add gel coloring gradually until the batter reaches that impossible cartoon shade, scraping the bowl to catch every streak
- Bake until perfectly done:
- Slide those pans into the oven for 25 to 30 minutes, rotating halfway through for even rising
- Prepare the signature frosting:
- Beat room temperature cream cheese and butter until silk smooth before sifting in powdered sugar cup by cup
- Build your cake base:
- Level those domed tops with a serrated knife, then stack with generous buttercream between the layers
- Apply the foundation:
- Skillfully coat the entire cake in a thin crumb layer and chill for 20 minutes until firm to the touch
- Add the final buttercream coat:
- Use a cake scraper to achieve those impossibly smooth sides and top surface that will serve as your canvas
- Create Betty's signature hair:
- Roll black fondant and cut that iconic silhouette, keeping it thick enough to hold its shape but thin enough to drape beautifully
- Shape her expressive features:
- Cut oversized white circles for eyes, tiny hearts for those signature sparkles, and that perfect red pout
- Assemble the iconic face:
- Position the hair piece first, then secure eyes and lips with tiny dabs of buttercream like edible glue
- Add those finishing details:
- Pipe or cut dramatic eyelashes and eyebrows, perhaps a red headband coil, then let everything rest before serving
 Save to Pinterest
 When I finally presented that completed cake at the party, my niece actually gasped out loud. She ran over to inspect it, then turned to me with wide eyes and asked if Betty Boop herself had come to her birthday. That completely unexpected moment made every frustrating fondant failure and butter batch of buttercream worth it.
Working With Fondant Like A Pro
Keep your hands dusted with cornstarch and work quickly because fondant responds to body heat by becoming sticky and unmanageable. If you notice tiny cracks developing, knead in a tiny bit of vegetable shortening to restore elasticity. Work on a cool surface and never store fondant decorations in the refrigerator unless you want them to weep and become gummy.
Timing Your Decorating Strategy
I learned the hard way that trying to rush fondant decorations the same day as serving is a recipe for stress. Make all the facial components at least 24 hours ahead and store them flat, separated by parchment paper in an airtight container. This gives them time to firm up enough to handle without losing their shape, plus you can fix any imperfections when you are not in a time crunch.
Serving And Storage Wisdom
This showstopper tastes best at room temperature when the velvet texture is at its peak and the buttercream becomes perfectly spreadable. The cream cheese frosting means any leftovers need refrigeration, but bring slices out 30 minutes before serving.
- Use a hot knife to cut clean slices without dragging the frosting
- Press any leftover decorations onto the cut sides of the cake for instant prettiness
- The red velvet layers actually develop more flavor on day two if wrapped properly
 Save to Pinterest
 There is something profoundly satisfying about combining nostalgic cartoon charm with serious baking technique. Every time I make this cake, I discover new details to perfect, keeping the process fresh and exciting.
Recipe FAQs
- → Can I make the fondant decorations ahead of time?
Yes, prepare fondant elements up to 24 hours in advance. Store in an airtight container at room temperature away from moisture and direct sunlight to prevent drying or fading.
- → How do I achieve the deep red color?
Use gel food coloring rather than liquid for vibrant color without thinning the batter. Start with one tablespoon and add more gradually until you reach the desired rich red hue.
- → Can I substitute the cream cheese frosting?
Swiss meringue buttercream works beautifully for a lighter, silkier finish. Traditional vanilla buttercream also pairs well if you prefer a sweeter, less tangy option.
- → Why does my red velvet sometimes turn brown?
Overbaking or using natural cocoa powder can cause reddish tones to brown. Use Dutch-processed cocoa, monitor baking time closely, and remove when a toothpick tests clean.
- → How should I store the finished creation?
Keep refrigerated in a cake box or covered container. Bring to room temperature 30 minutes before serving for optimal texture and flavor. Best consumed within 3-4 days.
- → What if I don't have experience working with fondant?
Practice cutting simple shapes on parchment paper first. Use templates for the hair silhouette and facial features. Cornstarch prevents sticking, and small dabs of frosting act as glue for attachment.