 Save to Pinterest
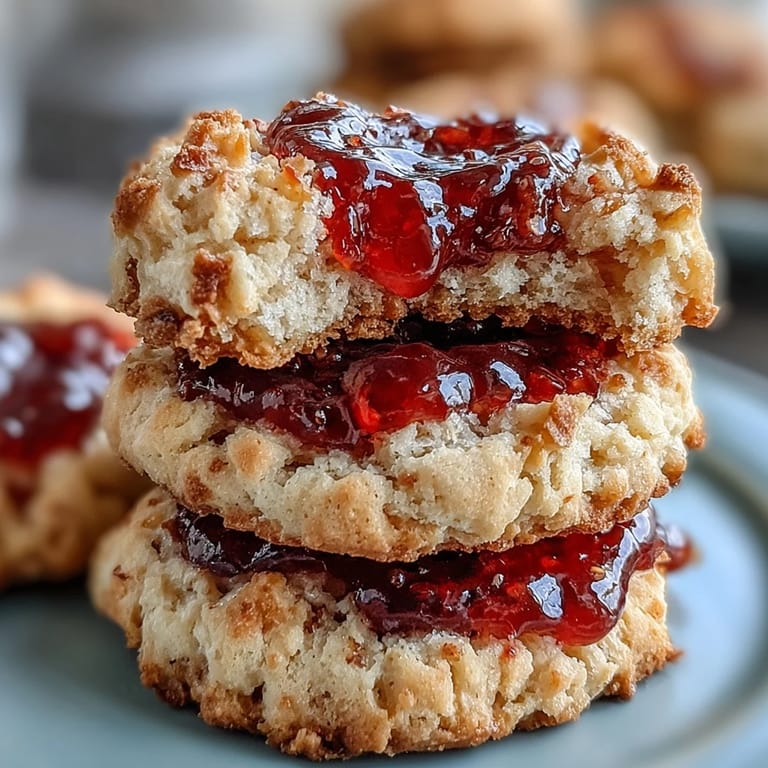
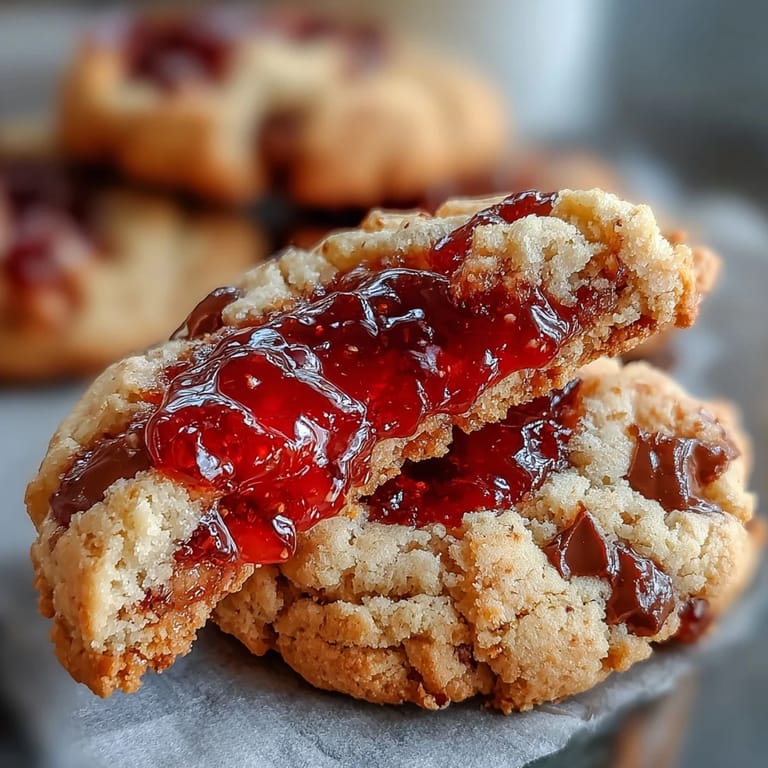
 My neighbor brought over a tin of thumbprint cookies last Christmas, and I watched her carefully press each indentation with such precision that I knew this wasn't just about making cookies, it was about crafting little edible gifts. The buttery dough gave way under her thumb, and the jewel-toned jam sitting in each center caught the kitchen light like it was on purpose. That afternoon, I decided I needed to master them, not because they were complicated, but because they felt like something worth sharing again and again.
I made a double batch one rainy Sunday and ended up with my sister at the kitchen table, both of us laughing because my thumbprint technique made some cookies look accidentally abstract while hers were perfectly uniform. By the second tray, we stopped caring about perfection and just focused on getting the jam in before the dough got too warm. She took half the batch to her office, and I found out days later people were asking for the recipe, which felt like winning something small but meaningful.
Ingredients
- Unsalted butter: Softened butter is non-negotiable here because it creams into that cloud-like base, so pull it out of the fridge at least an hour ahead.
- Granulated sugar: This is what gives the cookies their slight structure and helps them hold their thumbprint shape without spreading all over the pan.
- Egg yolk: Just the yolk, not the white, keeps the dough rich without making it too moist or cakey.
- Vanilla extract: One teaspoon is just enough to let you know something delicious happened, without shouting about it.
- All-purpose flour: Measure by spooning into your cup and leveling off, because scooping straight from the bag always packs it too tight.
- Salt: This tiny amount awakens everything else in the cookie and balances the sweetness perfectly.
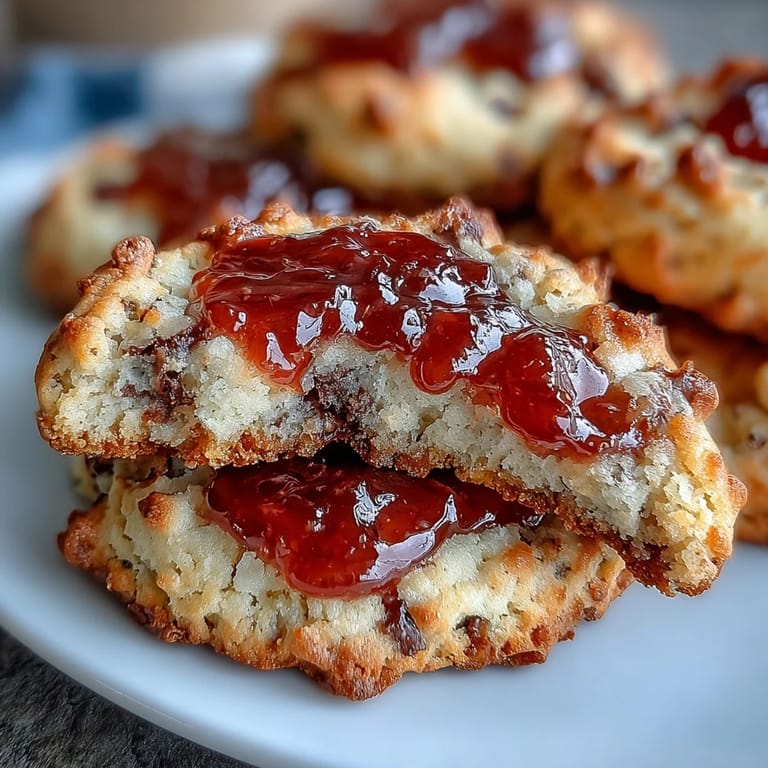
- Fresh strawberries: Hulled and diced small, they break down faster and release their juice when cooked, creating actual jam texture instead of chunky fruit.
- Lemon juice: This is the quiet genius move that makes the jam taste bright and prevents it from tasting one-note sweet.
Tired of Takeout? 🥡
Get 10 meals you can make faster than delivery arrives. Seriously.
One email. No spam. Unsubscribe anytime.
Instructions
- Preheat and prepare:
- Get your oven to 350°F and line two baking sheets with parchment paper so your cookies don't stick and slide around.
- Make the jam first:
- Combine diced strawberries, sugar, and lemon juice in a small saucepan over medium heat, stirring as they soften and release their liquid. Watch them break down over about 8 to 10 minutes until the mixture thickens and looks glossy, then set it aside completely to cool while you make the dough.
- Cream the butter and sugar:
- In a large bowl, beat softened butter and sugar together until it's pale, fluffy, and looks almost like frosting. This step takes a few minutes if you're using an electric mixer, and you'll see the color change as air gets whipped in.
- Add the egg and vanilla:
- Beat in the egg yolk and vanilla extract until everything is combined and smooth, scraping down the bowl a couple times so nothing hides at the bottom.
- Fold in the flour:
- Gently mix in the flour and salt until just combined, being careful not to overwork the dough or your cookies will be tough instead of tender.
- Shape the dough:
- Scoop out tablespoon-sized portions and roll each one between your palms into a ball, then place them on your prepared baking sheets about 2 inches apart. They won't spread much, but giving them space keeps them from cooking into each other.
- Press the thumbprints:
- Use your thumb or the back of a teaspoon to press a gentle indentation into the center of each ball, going deep enough to hold jam but not so far you hit the bottom. The warmth of your thumb actually helps the dough stay workable.
- Fill with jam:
- Spoon about half a teaspoon of cooled jam into each indentation, resisting the urge to overfill because jam needs room to set and stay put.
- Bake until golden:
- Bake for 13 to 15 minutes, watching for the edges to just turn golden while the centers stay pale and tender. They look underdone when you take them out, which is exactly right.
- Cool carefully:
- Let them sit on the baking sheet for 5 minutes to set slightly, then transfer them to a wire rack to cool completely so the jam firms up.
 Save to Pinterest
 There's something about wrapping a stack of these in cellophane and tying a ribbon around them that made me understand why my neighbor felt the need to give them away. They taste like intention, like someone took time, and that small gesture of baking for someone else becomes bigger than the recipe itself.
Homemade Jam That Actually Works
The difference between store-bought and homemade jam in this cookie is the texture and the brightness you get from fresh strawberries and lemon juice. When you make it yourself, you control how thick it gets, so you can stop it before it's too stiff for these small indentations. I learned this after making a batch with overcooked jam that barely fit in the thumbprints, so now I aim for a spreadable consistency that clings to a spoon but still moves.
Why Your Dough Matters More Than You Think
The entire structure of these cookies depends on a properly creamed butter and sugar base that's light enough to stay tender but strong enough to hold its shape and support the jam weight. If your butter isn't soft enough when you start, the dough will be too dense and the cookies will be cake-like instead of melt-in-your-mouth tender. I've made this mistake by rushing to use cold butter, and the resulting cookies were dense and forgettable, which taught me that the three minutes it takes to soften butter properly is never wasted time.
Storage, Gifting, and Flavor Swaps
These cookies stay fresh in an airtight container for about five days, though they rarely last that long in my house. The jam can be swapped for raspberry, apricot, or even a seedless blackberry preserve if you want to experiment, and dusting the cooled cookies with powdered sugar adds elegance without changing the flavor. A few other thoughts that might help you get the most from this recipe:
- Make the jam while your butter is softening so you're not waiting around between steps.
- If you're gifting these, wait until they're completely cool before packaging or condensation will make them soft.
- These freeze beautifully unfilled, so you can bake the shells and fill them fresh the day you want to serve them.
 Save to Pinterest
 These cookies remind me that the best recipes are the ones that feel easy enough to make again but special enough to share. Every time I bake them, someone asks for the recipe, and I get to pass along something simple that feels like more.
Recipe FAQs
- → What is the best way to prepare the strawberry jam filling?
Simmer diced fresh strawberries with sugar and lemon juice over medium heat until the mixture thickens and breaks down, usually about 8–10 minutes. Allow it to cool before filling the cookies.
- → Can I use store-bought jam instead of fresh?
Yes, high-quality store-bought strawberry jam can be used for convenience, though fresh jam offers a brighter, fresher flavor.
- → How do I shape the cookies for the jam center?
Roll tablespoon-sized dough balls and make an indentation in the center using your thumb or the back of a teaspoon to hold the jam.
- → What is the baking time and temperature?
Bake the cookies at 350°F (175°C) for 13–15 minutes until the edges turn light golden brown.
- → Are there alternative jams I can use?
Try raspberry or apricot jam as flavored variations to suit your preference.