 Save to Pinterest
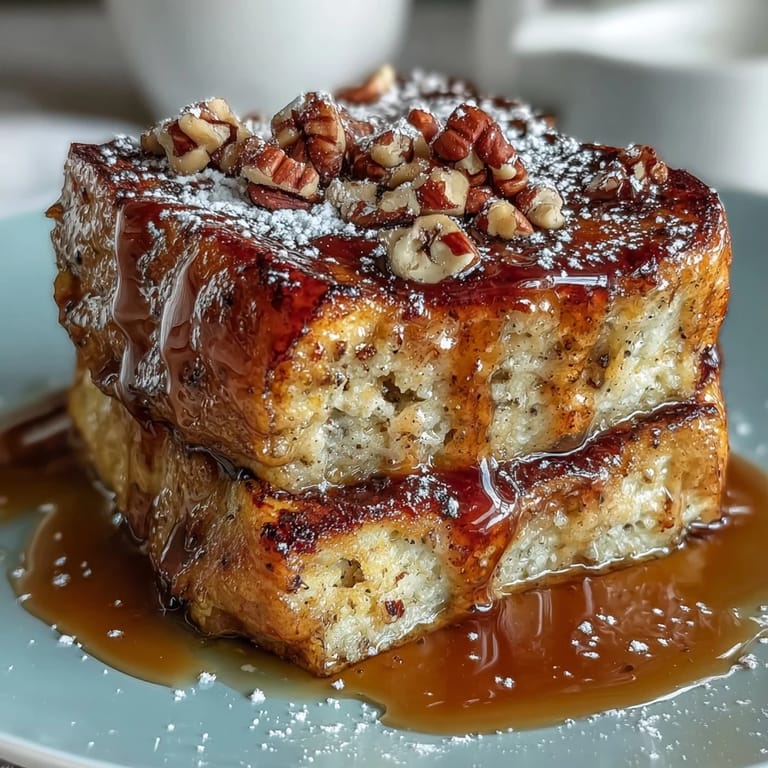
 Sunday morning at my aunt's house, I watched her pull a bubbling casserole from the oven that smelled like a pancake breakfast and maple syrup had decided to have a love affair. She'd thrown it together in fifteen minutes flat while we were still in our pajamas, and somehow it tasted like the most elegant brunch I'd ever had. That's when I realized pancakes didn't need a griddle or your full attention—they just needed permission to be baked, golden, and gloriously easy. I've made this version a hundred times since, and it never fails to make people ask for seconds before they've even finished their first slice.
I made this for a winter holiday potluck once, and my neighbor brought it home half-empty with a note that just said, "more please?" Her kids apparently fought over the last corner piece, which I still think is the highest compliment any breakfast dish can receive. It became the thing people started requesting by name, and I'd catch myself making it whenever someone mentioned they were hosting brunch. There's something about a casserole that feels both comforting and special at the same time.
Ingredients
- All-purpose flour: Two cups gives you that tender crumb that actually tastes like pancakes, not dense cake.
- Granulated sugar: Just two tablespoons keeps things balanced; too much and you're eating dessert for breakfast.
- Baking powder: Two teaspoons is your lift, giving that characteristic fluffy pancake rise even in a baking dish.
- Baking soda: A half teaspoon works with the eggs and buttermilk-like tang to keep things light and tender.
- Salt: Never skip the half teaspoon; it makes everything taste more like itself.
- Large eggs: Two eggs bind everything and add richness without heaviness.
- Whole milk: Two cups creates that pourable batter and contributes to the tender, moist crumb.
- Unsalted butter: Melted and measured at a quarter cup, plus extra for greasing your dish so nothing sticks.
- Vanilla extract: Just a teaspoon, but it's the whisper that makes people wonder what's in here.
- Pure maple syrup: Half a cup swirled through, plus more for serving at the table where people can drizzle to their hearts' content.
- Pecans or walnuts: Optional, but the half cup adds a buttery crunch that elevates this from simple to special.
- Powdered sugar: A light dusting at the end makes it look like you planned this, even if you threw it together half-asleep.
Tired of Takeout? 🥡
Get 10 meals you can make faster than delivery arrives. Seriously.
One email. No spam. Unsubscribe anytime.
Instructions
- Set your oven and grease your dish:
- Preheat to 350°F and butter that 9x13-inch baking dish generously so nothing clings when you slice. This is your foundation, so don't rush it.
- Whisk your dry team together:
- Flour, sugar, baking powder, baking soda, and salt go into a large bowl and get whisked until they're evenly distributed. You're looking for no streaks of baking powder hiding in corners.
- Combine your wet ingredients:
- In a separate bowl, crack your eggs and whisk them with milk, melted butter, and vanilla until it's smooth and pale. This mixture should look homogeneous and smell like vanilla comfort.
- Bring them together gently:
- Pour your wet mixture into the dry ingredients and stir just until combined—lumps are your friend here because overmixing creates toughness. Stop when you see a few dry streaks; they'll disappear in the oven.
- Pour and prepare for baking:
- Spread the batter evenly into your greased dish, smoothing the top with the back of a spoon or spatula. Take a breath; you're almost there.
- Swirl in the maple magic:
- Drizzle that half cup of maple syrup over the batter in a loose pattern, then take a knife and gently drag it through to create marbled ribbons. Don't overwork it—a few swoops create more visual drama than a hundred swirls.
- Add crunch if you're feeling fancy:
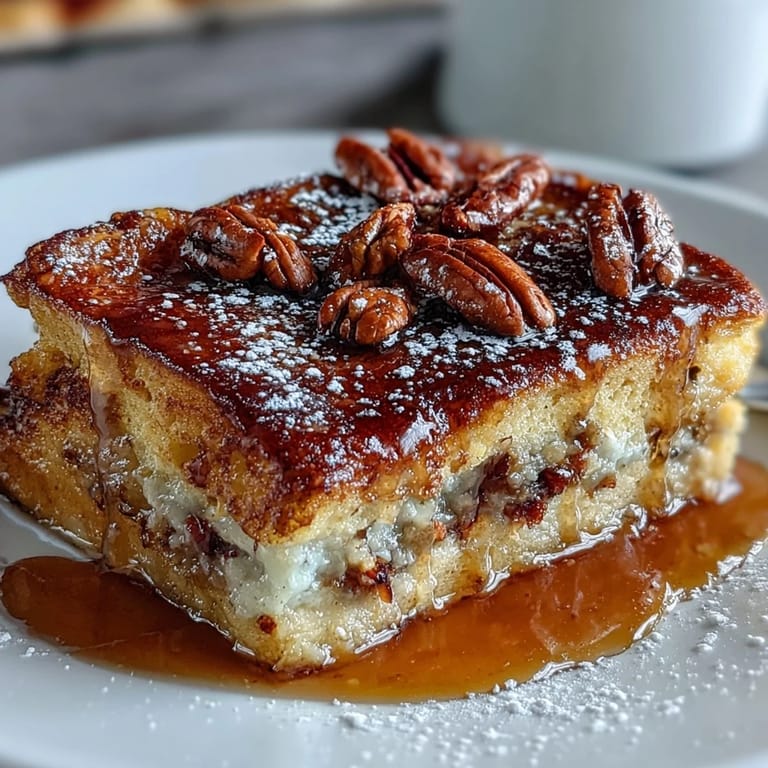
- Sprinkle your chopped nuts over the top if you're using them, distributing them so every slice gets some.
- Bake until golden:
- Twenty-eight to thirty-two minutes in a 350°F oven until the top is golden brown and a toothpick inserted in the center comes out clean. The edges will pull away slightly from the dish when it's done.
- Rest and finish:
- Let it cool for five minutes—this isn't just waiting, it's letting everything set so your slices stay clean. Dust with powdered sugar, slice into squares, and serve warm with extra maple syrup on the side.
 Save to Pinterest
 The first time someone asked me to teach them this recipe, I realized it wasn't really about the ingredients or technique—it was about how this dish gives you permission to feed people something that tastes like you cared without requiring you to stand at a stove. That's when breakfast casseroles stopped being second-class citizens in my kitchen and became one of my most-reached-for recipes.
When to Make This
This casserole was born for moments when you have people to feed but don't have energy to perform the griddle-flipping dance. Early mornings when the house is still quiet, holiday mornings when everyone's gathered, or lazy weekends when brunch feels like the only meal worth discussing—this is your answer. I've made it on random Thursdays just because, and I've made it for crowds where precision felt impossible, and it never complained.
Making It Your Own
The base recipe is so forgiving that you can treat it like a canvas instead of a rule book. Some mornings I've stirred in fresh blueberries or scattered sliced bananas right into the batter, and other times I've added a handful of chocolate chips because why not. The maple syrup is the star, but everything else is flexible—dairy-free milk and butter work beautifully if that's what your kitchen has, and the nuts are truly optional (though I rarely skip them).
Serving and Storage Wisdom
Serve this warm right from the oven if you can, though it stays delicious at room temperature and even reheats gently the next morning. I've learned that people want their own pitcher of maple syrup at the table so they can control the sweetness level, and fresh berries on the side make everything feel more intentional. A dollop of whipped cream or a drizzle of extra syrup transforms leftovers into something that tastes brand new.
- Let it cool five minutes before slicing so your pieces don't fall apart on the spatula.
- Cover and refrigerate leftovers for up to three days, then reheat gently in a 325°F oven until warm.
- This freezes beautifully wrapped tightly, and tastes almost as good thawed and reheated as it did fresh.
 Save to Pinterest
 This recipe became my answer to the question I was always asking: how do I feed people something that tastes special without making breakfast feel like a production? It's proof that the best meals aren't the most complicated ones—they're the ones that let you show up as yourself and still feel proud of what you're serving.
Recipe FAQs
- → How do I achieve a fluffy texture?
Use fresh baking powder and avoid overmixing the batter; a few lumps are fine to keep it airy.
- → Can I use plant-based milk and butter?
Yes, substituting dairy with plant-based alternatives works well for a dairy-free version without sacrificing moisture.
- → What nuts work best for topping?
Chopped pecans or walnuts add a delightful crunch and complement the maple's sweetness perfectly.
- → How should I swirl the maple syrup?
After drizzling syrup over the batter, use a knife to gently swirl it creating a marbled effect without overmixing.
- → What is the best way to serve this dish?
Serve warm with extra maple syrup, powdered sugar, or fresh berries for added freshness and flavor contrast.