 Save to Pinterest
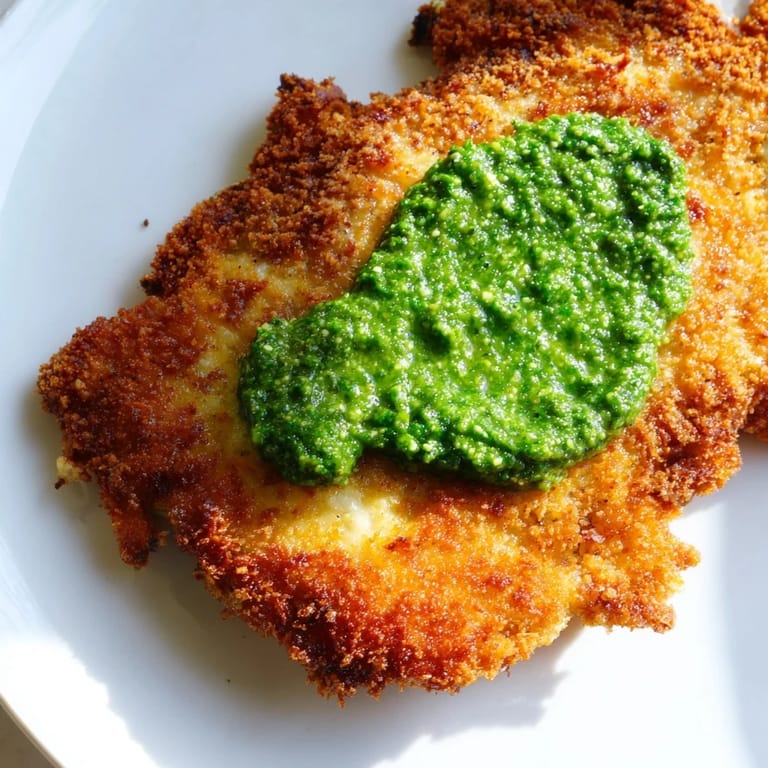
 The smell of garlic and basil drifting through the kitchen always brings me back to that evening when I realized I had twenty minutes to make dinner and a pack of chicken breasts staring back at me. I grabbed what I had, panko, Parmesan, eggs, and decided to trust the process. The cutlets turned golden and shatteringly crisp, and when I dolloped pesto on top, everything just clicked. It became the kind of meal I could pull off on autopilot but still feel proud serving.
I made this for my sister once when she came over tired and hungry after a long shift. She took one bite, closed her eyes, and said it tasted like vacation. I think it was the pesto, bright and summery, cutting through the richness of the fried chicken. We ate it with our hands, standing at the counter, laughing about nothing in particular.
Ingredients
- Boneless, skinless chicken breasts: Pounding them thin is the secret to even cooking and maximum crispiness, plus they cook faster so you avoid that dreaded dry center.
- Eggs and milk: This mixture helps the breadcrumbs stick like glue and creates a golden, cohesive crust that doesnt flake off in the pan.
- All-purpose flour: The first layer that dries the chicken just enough so the egg mixture clings properly, think of it as the foundation.
- Panko breadcrumbs: These Japanese-style crumbs are coarser and airier than regular breadcrumbs, which means they fry up lighter and crunchier every single time.
- Grated Parmesan cheese: It adds a nutty, salty depth to the crust and helps it brown beautifully without burning.
- Dried Italian herbs: Optional but lovely, they bring a quiet background hum of oregano and thyme that makes the whole dish smell like a trattoria.
- Olive oil: Use enough to create a shallow pool in the pan so the cutlets fry rather than steam, thats where the crispiness lives.
- Basil pesto: Whether you make it or buy it, this is the flavor bomb that ties everything together, rich, herby, and just a little bit indulgent.
- Fresh basil leaves and lemon wedges: A handful of basil makes it look restaurant-ready, and a squeeze of lemon brightens the richness right before you dig in.
Tired of Takeout? 🥡
Get 10 meals you can make faster than delivery arrives. Seriously.
One email. No spam. Unsubscribe anytime.
Instructions
- Season the chicken:
- Lay out your chicken breasts and sprinkle both sides generously with salt and freshly ground black pepper. Dont be shy, this is your only chance to season the meat itself.
- Set up your breading station:
- Grab three shallow bowls and fill the first with flour, the second with beaten eggs whisked together with milk, and the third with panko mixed with Parmesan and Italian herbs. Line them up assembly-line style so you can move quickly.
- Coat the cutlets:
- Take each chicken piece and dredge it in the flour, shaking off any excess so it doesnt clump. Dip it into the egg mixture, letting the extra drip off, then press it firmly into the panko mixture, making sure every inch is covered.
- Heat the oil:
- Pour olive oil into a large skillet and set it over medium-high heat until it shimmers and a breadcrumb dropped in sizzles immediately. If the oil is too cool, the crust will be greasy instead of crisp.
- Fry the cutlets:
- Lay the breaded chicken in the hot oil without crowding the pan, working in batches if needed. Fry for 3 to 4 minutes per side until the crust is deep golden and the chicken is cooked through, then transfer to a paper towel-lined plate.
- Finish and serve:
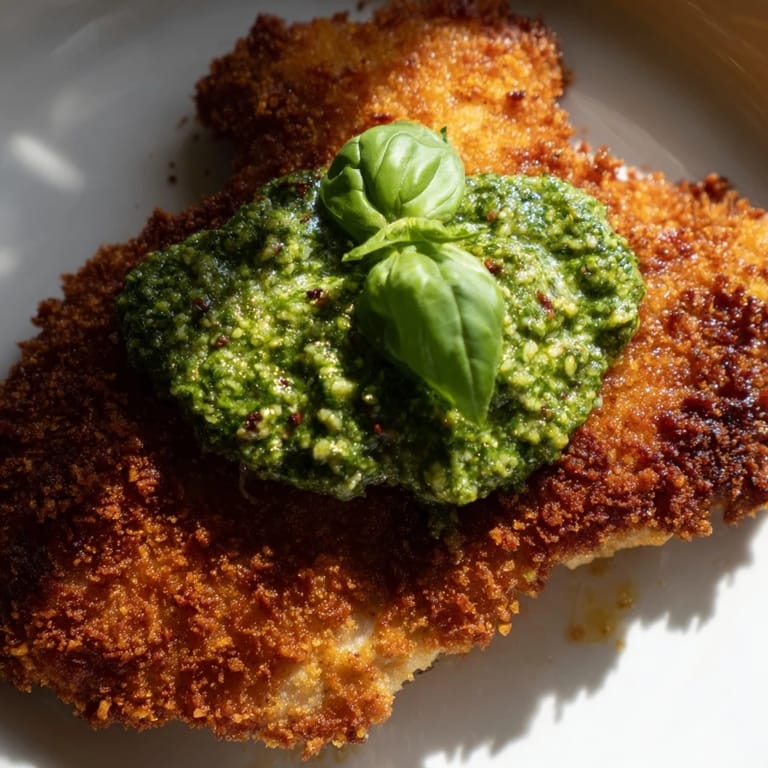
- Arrange the cutlets on a platter and spoon a generous dollop of pesto onto each one while theyre still warm. Scatter fresh basil leaves on top and tuck lemon wedges alongside for squeezing.
 Save to Pinterest
 One night I served this with a simple arugula salad and a glass of cold Pinot Grigio, and my friend looked at me and said, This is the kind of meal that makes you feel like you have your life together. I laughed, but I knew what she meant. Sometimes a perfectly crisp chicken cutlet with a swirl of green pesto is all the proof you need that youre doing just fine.
What to Serve It With
This chicken is rich and satisfying, so I like to keep the sides light and fresh. A handful of arugula tossed with lemon juice and olive oil cuts through the richness beautifully. You could also serve it over pasta tossed with a little butter and Parmesan, or alongside roasted vegetables like zucchini and cherry tomatoes. If youre feeding a crowd, a crusty baguette and a big green salad make it feel like a feast.
How to Store and Reheat
Leftovers keep well in an airtight container in the fridge for up to three days, though the crust will soften a bit. To bring back some of that crispiness, reheat the cutlets in a 375-degree oven for about 10 minutes instead of using the microwave. You can also slice them up cold and tuck them into a sandwich with fresh greens and a smear of mayo, which is honestly one of my favorite lunches.
Make-Ahead and Freezing Tips
You can bread the chicken cutlets a few hours ahead and keep them on a baking sheet in the fridge until youre ready to fry, which makes weeknight cooking even easier. If you want to freeze them, lay the breaded (but uncooked) cutlets on a parchment-lined tray, freeze until solid, then transfer to a freezer bag. Fry them straight from frozen, adding an extra minute or two per side.
- Breaded cutlets can be refrigerated for up to 4 hours before frying.
- Frozen uncooked cutlets keep for up to 2 months and fry beautifully without thawing.
- Cooked cutlets can be frozen too, but theyre best reheated in the oven to restore some crispness.
 Save to Pinterest
 This recipe has become one of those reliable favorites that I turn to when I want something comforting, quick, and just a little bit special. I hope it brings the same easy joy to your table.
Recipe FAQs
- → How thin should I pound the chicken breasts?
Pound the chicken breasts to approximately 1/2-inch thickness. This ensures even cooking throughout and helps achieve that perfect tender, juicy center while the coating crisps up beautifully.
- → Can I prepare the breaded cutlets in advance?
Yes, you can bread the cutlets up to 4 hours ahead. Place them on a parchment-lined tray, cover loosely with plastic wrap, and refrigerate. Pan-fry just before serving for optimal crispness.
- → What's the best way to keep cutlets crispy if cooking in batches?
Transfer each batch to a paper towel-lined plate immediately after frying. This absorbs excess oil while keeping them warm. For serving, arrange on a platter without stacking to maintain crispiness.
- → Can I use chicken thighs instead of breasts?
Absolutely. Chicken thighs work well and stay particularly juicy. Pound them to the same thickness and follow the same breading and frying process. Cooking time may vary slightly depending on size.
- → How do I make homemade pesto for this dish?
Blend fresh basil leaves, garlic, pine nuts, Parmesan cheese, and olive oil until you reach desired consistency. You can pulse in a food processor or use a mortar and pestle. Fresh homemade pesto adds exceptional flavor compared to store-bought versions.
- → What's the ideal oil temperature for pan-frying?
Heat olive oil over medium-high heat until shimmering and just beginning to smoke. The oil should be hot enough to create a golden crust in 3-4 minutes per side without burning the coating or drying out the chicken.